m (Reverted edits by 206.176.80.254 (talk | block) to last version by A-06) |
Tag: Visual edit |
||
| (20 intermediate revisions by 10 users not shown) | |||
| Line 15: | Line 15: | ||
[[File:Background plaza.jpg|200px|thumb|The [[Trainstation Plaza]].]] |
[[File:Background plaza.jpg|200px|thumb|The [[Trainstation Plaza]].]] |
||
| − | Nearly twenty years after the [[Black Mesa Incident]]<ref name="ep1webpage">{{InternetArchive|20060409033136/http://ep1.half-life2.com/story.php|''Episode One'': The story so far|''Half-Life 2''<nowiki>'</nowiki>s official website}}</ref> the G-Man wakes Gordon Freeman and inserts him (seemingly |
+ | Nearly twenty years after the [[Black Mesa Incident]]<ref name="ep1webpage">{{InternetArchive|20060409033136/http://ep1.half-life2.com/story.php|''Episode One'': The story so far|''Half-Life 2''<nowiki>'</nowiki>s official website}}</ref>, the G-Man wakes Gordon Freeman from stasis and inserts him (seemingly without any goals) into a train arriving in [[City 17]], a city located somewhere in Eastern Europe under the control of the [[Combine|Combine Empire]]. |
| − | After leaving the train, Gordon and other passengers are welcomed by a broadcast by Dr. |
+ | After leaving the train, Gordon and the other passengers are welcomed by a broadcast by [[Wallace Breen|Dr. Wallace Breen]], former administrator of [[Black Mesa]], and now the administrator of [[Earth]]. Continuing on his way, Gordon meets armed [[Civil Protection]] officers policing the [[City 17 Trainstation|train station]] and its surroundings. One of them separates him from the rest of the arriving citizens and directs him into a small interrogation room before revealing himself to be former [[Black Mesa security guard]] [[Barney Calhoun]], who is operating undercover for the [[Resistance]]. |
| − | Barney contacts Dr. |
+ | Barney contacts [[Isaac Kleiner|Dr. Isaac Kleiner]], Gordon's mentor from his [[Wikipedia:Massachusetts Institute of Technology|MIT]] days and former Black Mesa employee. After a bit of discussion, they decide to send Gordon over to [[Kleiner's Lab]]. Along the way, Gordon finds himself in the middle of a Civil Protection raid on a tenement house; after being captured, Gordon is rescued by a young woman named [[Alyx Vance]]. |
{{-}} |
{{-}} |
||
| Line 28: | Line 28: | ||
[[File:Behindyou.jpg|thumb|200px|Gordon outside the lab during the teleporter malfunction.]] |
[[File:Behindyou.jpg|thumb|200px|Gordon outside the lab during the teleporter malfunction.]] |
||
| − | Alyx, daughter of [[Eli Vance]], a former Black Mesa employee now leading the Resistance against the Combine, takes Gordon to Dr. Kleiner's lab |
+ | Alyx, the daughter of [[Eli Vance]], a former Black Mesa employee now leading the Resistance against the Combine, takes Gordon to Dr. Kleiner's lab. There he is given an [[HEV|H.E.V. Suit]] and instructed to be teleported to [[Black Mesa East]] with Alyx, where he will be able to work alongside other scientists. |
| − | After teleporting Alyx, Gordon is next, but |
+ | After teleporting Alyx, Gordon is next, but an interruption from Kleiner's pet [[Headcrab]], [[Lamarr]], causes a malfunction in the teleporter, sending Gordon to Dr. Breen's office, who recognizes him as a threat and puts Combine forces on full alert. |
Following the failed teleport sequence, Gordon's only option is to go on foot through the old [[Canals]], with Civil Protection officers in hot pursuit. Before starting his journey, Gordon is given a [[Crowbar]] by Barney. |
Following the failed teleport sequence, Gordon's only option is to go on foot through the old [[Canals]], with Civil Protection officers in hot pursuit. Before starting his journey, Gordon is given a [[Crowbar]] by Barney. |
||
| + | |||
| ⚫ | |||
| + | *A red letter day is any day of special significance. In this case, the day the chapter takes place on is the day where the teleporter, which is intended to be used as a much safer way to help citizens escape the city to Black Mesa East, is finished. |
||
{{-}} |
{{-}} |
||
| Line 41: | Line 44: | ||
[[File:HalfLife2 City17 Railway&Canal.jpg|200px|thumb|A [[Razor Train]] passes by the canal.]] |
[[File:HalfLife2 City17 Railway&Canal.jpg|200px|thumb|A [[Razor Train]] passes by the canal.]] |
||
| − | With the Crowbar Gordon is able to disarm two [[Civil Protection]] officers who had cornered a [[Consoling Couple|couple]] of [[Citizen]] |
+ | With the Crowbar, Gordon is able to disarm two [[Civil Protection]] officers who had cornered a [[Consoling Couple|couple]] of [[Citizen|Citizens]], obtaining in this way his first firearm, the [[USP Match]]. Being armed allows Gordon to defeat all Civil Protection Units dispatched to the area before reaching [[Station 12]], one of the many stations set up by the [[Underground Railroad]], a network helping refugees escape [[City 17]]. |
| − | Most of these Stations and outposts are already under attack by the time Gordon arrives; generally filled with [[Manhack]]s or being bombarded with [[Headcrab Shell]]s. |
+ | Most of these Stations and outposts are already under attack by the time Gordon arrives; generally filled with [[Manhack]]s or being bombarded with [[Headcrab Shell]]s. Along the way, Gordon obtains his second firearm, the [[MP7]]. |
Eventually, Gordon reaches [[Station 6]] (now under attack by [[Headcrab]]s); where he receives the [[Airboat]], a makeshift vessel with an aircraft-type propeller, to help him traverse the toxic system of canals and get to Black Mesa East quick and safely. |
Eventually, Gordon reaches [[Station 6]] (now under attack by [[Headcrab]]s); where he receives the [[Airboat]], a makeshift vessel with an aircraft-type propeller, to help him traverse the toxic system of canals and get to Black Mesa East quick and safely. |
||
| Line 53: | Line 56: | ||
[[File:Background chopper canals.jpg|200px|thumb|Hunter-Chopper passing by [[Station 7]].]] |
[[File:Background chopper canals.jpg|200px|thumb|Hunter-Chopper passing by [[Station 7]].]] |
||
| − | Aboard the [[airboat]], Gordon fights off numerous Civil Protection units and a [[Hunter |
+ | Aboard the [[airboat]], Gordon fights off numerous Civil Protection units and a [[Hunter-Chopper]]. Along the way, the boat is upgraded with a [[pulse gun]] by a [[Vortigaunt]]. |
| − | |||
| ⚫ | |||
| − | *During the first few moments aboard the airboat, the player can see the G-Man on the ledge of a barn. When the player approaches, the G-Man retreats into the barn. Closer inspection reveals only a few headcrab zombies. It is possible to see him a couple of times more afterwards, after the [[airboat]] is equipped with a [[Hunter Chopper]]'s gun. |
||
| − | *The name of the chapter is a reference to the golf term [[Wikipedia:Water hazard#Water hazard|Water hazard]]. |
||
{{-}} |
{{-}} |
||
| Line 67: | Line 66: | ||
Gordon Freeman finally reaches his destination, Black Mesa East, after a series of chases through the canals and waterways around City 17. Gordon meets Dr. [[Judith Mossman]] for the first time, and is reunited with Resistance Leader and former Black Mesa Scientist [[Eli Vance]] and Alyx. Gordon is also introduced to the [[Zero Point Energy Field Manipulator]], also known as the 'Gravity Gun', a physics manipulator that quickly becomes indispensable, and after that, Gordon meets [[Dog]], Alyx's robotic "pet." Like ''A Red Letter Day'', this chapter is full of insight and dialogue about the current state of the world, the people in it, and the aftermath of the [[Black Mesa Incident]]. While Gordon is playing with Dog in the scrapyard, Alyx spots Combine Scanners sweeping the area, shortly before an all out aerial raid on Black Mesa East. While attempting to rejoin the others, Gordon and Dog are separated from Alyx by a collapsed ceiling, and Gordon is forced to escape down a tunnel to [[Ravenholm]], a place that Alyx didn't want to talk about earlier, showing obvious discomfort at the thought. |
Gordon Freeman finally reaches his destination, Black Mesa East, after a series of chases through the canals and waterways around City 17. Gordon meets Dr. [[Judith Mossman]] for the first time, and is reunited with Resistance Leader and former Black Mesa Scientist [[Eli Vance]] and Alyx. Gordon is also introduced to the [[Zero Point Energy Field Manipulator]], also known as the 'Gravity Gun', a physics manipulator that quickly becomes indispensable, and after that, Gordon meets [[Dog]], Alyx's robotic "pet." Like ''A Red Letter Day'', this chapter is full of insight and dialogue about the current state of the world, the people in it, and the aftermath of the [[Black Mesa Incident]]. While Gordon is playing with Dog in the scrapyard, Alyx spots Combine Scanners sweeping the area, shortly before an all out aerial raid on Black Mesa East. While attempting to rejoin the others, Gordon and Dog are separated from Alyx by a collapsed ceiling, and Gordon is forced to escape down a tunnel to [[Ravenholm]], a place that Alyx didn't want to talk about earlier, showing obvious discomfort at the thought. |
||
| − | |||
| − | ===Trivia=== |
||
| − | *The faceplate belonging to the original H.E.V. charger from ''Half-Life'' and its expansions can be found on a ledge in the scrapyard. |
||
{{-}} |
{{-}} |
||
| Line 77: | Line 73: | ||
[[File:RavenholmHL2.jpg|200px|thumb|Zombies in Ravenholm.]] |
[[File:RavenholmHL2.jpg|200px|thumb|Zombies in Ravenholm.]] |
||
| − | Gordon journeys through the tunnel to the ghost town of Ravenholm. Originally a hidden village that lived free from the rule of the Combine, it was discovered by the Combine and attacked by hundreds of [[Headcrab Shell]]s, thus transforming almost the entire population into deadly [[Zombie]]s. This chapter also introduces two new headcrab variants - the [[Poison Headcrab]] and the [[Fast Headcrab]] - and their Zombie counterparts. Freeman kills Zombies and avoids bizarre deathtraps, meeting the man who set them, [[Father Grigori]], who gives Gordon a [[Combine SPAS-12|shotgun]]. Freeman and Grigori make their way to an old mine which has a path that leads back to City 17, but Grigori stays behind to fight Zombies, and he continues to do so until the crypt behind him bursts open, leaving more zombies to come out from it. He continues to shoot the Zombies for a while until he runs through a blazing fire into the crypt. |
+ | Gordon journeys through the tunnel to the ghost town of Ravenholm. Originally a hidden village that lived free from the rule of the Combine, it was discovered by the Combine and attacked by hundreds of [[Headcrab Shell]]s, thus transforming almost the entire population into deadly [[Zombie]]s. This chapter also introduces two new headcrab variants - the [[Poison Headcrab]] and the [[Fast Headcrab]] - and their Zombie counterparts. Freeman kills Zombies and avoids bizarre deathtraps, meeting the man who set them, [[Father Grigori]], who gives Gordon a [[Combine SPAS-12|shotgun]]. Freeman and Grigori make their way to an old mine which has a path that leads back to City 17, but Grigori stays behind to fight Zombies, and he continues to do so until the crypt behind him bursts open, leaving more zombies to come out from it. He continues to shoot the Zombies for a while until he runs through a blazing fire into the crypt. Gordon navigates the mines ahead, then walks down a railroad avoiding Combine snipers to reach [[Shorepoint Base|Shorepoint Base.]] |
| − | ===Trivia=== |
||
| − | *Amongst the ambient sounds that can be heard in Ravenholm include female screams and occasional sobbing. |
||
| − | *The tunnel that leads from Black Mesa East to Ravenholm sports a number of warning signs. Some of these include "DANGER: CONTAMINATED AREA.", "STOP, DO NOT ENTER", "WARNING: KEEP OUT" and "WARNING; NO TRESPASSING". |
||
| − | *If the player is to run to the entrance of the mine then turn around and go back, Grigori will still be fighting the hordes of zombies. |
||
| − | *The title is a reference to a comment made by [[Alyx Vance]] in the preceding chapter while showing Freeman around the base: "That's the old passage to Ravenholm. We don't go there anymore." |
||
| − | * If players pass through the town using the [[Zero Point Energy Field Manipulator|Gravity Gun]] and nothing else (i.e. not using the [[crowbar]] or any of their guns), they will earn the "Zombie Chopper" achievement/trophy. |
||
{{-}} |
{{-}} |
||
| Line 91: | Line 81: | ||
[[File:Highway 17.jpg|200px|thumb|Broken bridge and car wrecks on Highway 17 near [[Dock 137]].]] |
[[File:Highway 17.jpg|200px|thumb|Broken bridge and car wrecks on Highway 17 near [[Dock 137]].]] |
||
| − | Freeman is informed that Eli Vance has been taken to [[Nova Prospekt]] and sets out on a journey along [[Highway 17]] to rescue him. The player encounters [[Combine Soldier]]s for the first time as well as a new type of Xen alien, the [[Antlion]]s. Colonel [[Odessa Cubbage]] is also met in this level, giving Gordon the [[Resistance RPG|RPG]]. |
+ | Freeman is informed that Eli Vance has been taken to [[Nova Prospekt]] and sets out on a journey along [[Highway 17]] to rescue him. The player encounters [[Combine Soldier]]s for the first time as well as a new type of Xen alien, the [[Antlion]]s. Colonel [[Odessa Cubbage]] is also met in this level, giving Gordon the [[Resistance RPG|RPG]]. Gordon deactivates [[Force Field|Force Fields ]]in order to progress across a bridge. |
| + | |||
| − | ===Trivia=== |
||
| − | * If the player loses the buggy, either by punting it into the sea with the [[Gravity Gun]] or by getting hit by the [[Razor Train]], the message: "Assignment: Terminated. Subject: Freeman. Reason: Failure to preserve mission-critical resources." will be displayed. A similar message occurs if the player punts the buggy into the water after defeating a gunship following him on the highway, or jumps off a cliff. The message says: "Assignment: Terminated. Subject: Freeman. Reason: Demonstration of exceedingly poor judgement". |
||
| − | * In the picture shown in the chapter selection menu, the Scout Car appears to be held in place with wheel chocks, like in ''[[Half-Life 2 Beta]]''. |
||
{{-}} |
{{-}} |
||
| Line 101: | Line 89: | ||
[[File:Bunkers.jpg|200px|thumb|[[Combine Bunker]]s soon to be assaulted by Antlions.]] |
[[File:Bunkers.jpg|200px|thumb|[[Combine Bunker]]s soon to be assaulted by Antlions.]] |
||
| − | Continuing on to Nova Prospekt, Gordon exits a Zombie-infested tunnel and passes through the last part of the coast without the [[Scout Car]]. He encounters the first [[Antlion Guard]] of the game and is then trained in usage of the [[Antlion Guard]]'s [[pheropod]] |
+ | Continuing on to Nova Prospekt, Gordon exits a Zombie-infested tunnel, fends off a Combine raid on [[Lighthouse Point]], and passes through the last part of the coast without the [[Scout Car]]. He encounters the first [[Antlion Guard]] of the game and is then trained in usage of the [[Antlion Guard]]'s [[pheropod|pheropods]] by a [[Vortigaunt]] working with the Resistance. He then continues to the final part of the coast, where he battles many Nova Prospekt guards on his way into the prison. In this chapter, Antlions become the player's allies, since Gordon has the Bugbait pheropod. |
| − | |||
| − | ===Trivia=== |
||
| − | *The circumstances under which an Antlion will be friendly to the player rather than hostile are determined by the map rather than possession of the pheropods. For instance, even if the player had pheropods during the initial journey across the beach before fighting the first Antlion Guard (through the use of cheats), the Antlions will still attack them regardless. |
||
| − | *The Spanish name for this level is ''Bunkers''. |
||
| − | *The name of the chapter is a reference to the golf term [[Wikipedia:Water hazard#Bunker Sand trap|Sand Trap]], also known as bunkers. |
||
| − | *The two large pipes coming down along the mountain late in the chapter resemble the pipes in the canyon featured in ''[[Half-Life storyline#Surface Tension|Surface Tension]]''. |
||
| − | *There is a glitch which can be used to explore the sandy area without being attacked or chased by Antlions. In order to do this, the player must first defend [[Sandy]], and rush when he says "poor Lazlo", the Antlions will spawn, but the player can ignore them and run until being far away from them. The Antlions will chase Sandy, but Sandy and Lazlo will de-spawn, and the Antlions will simply stand there. As long as the player does not return to the point where Sandy is met, or does not kill Antlions, Antlions will not spawn and the player will be able to freely explore the area without worrying about the Antlions. However, this disables the achievement "Keep Off The Sand" as this will count as the player stepping on the sand. |
||
{{-}} |
{{-}} |
||
| Line 116: | Line 97: | ||
[[File:Laundry room.jpg|200px|thumb|[[Nova Prospekt Prison Guard]]s fighting [[Antlion]]s in the laundry room of block C1 in [[Nova Prospekt]].]] |
[[File:Laundry room.jpg|200px|thumb|[[Nova Prospekt Prison Guard]]s fighting [[Antlion]]s in the laundry room of block C1 in [[Nova Prospekt]].]] |
||
| − | Gordon gains access to Nova Prospekt, a [[Combine]] base, and a former prison, breaching its defenses with the help of an army of [[Antlion]] |
+ | Gordon gains access to Nova Prospekt, a [[Combine]] base, and a former prison, breaching its defenses with the help of an army of [[Antlion|Antlions]], with the goal of finding and rescuing the captured Resistance leader, [[Eli Vance]]. This is also the last chapter where Antlions are encountered, because the player soon leaves Antlion Territory. The player is introduced to [[Combine Turret|Combine Turrets]] here as well. |
| − | |||
| − | ====Trivia==== |
||
| − | *If the player escapes the second Antlion Guard encounter without killing it, the Guard will begin searching around the room for them. |
||
{{-}} |
{{-}} |
||
| Line 128: | Line 106: | ||
Gordon meets up with Alyx Vance in the Nova Prospekt train depot. They discover that Dr. Mossman was actually a Combine spy working on Breen's side. Together, they search the [[Nova Prospekt|prison]] for Eli Vance and Judith Mossman, all the while fighting off [[Nova Prospekt Prison Guard|security forces]]. They split up several times, but finally they reunite to track down Mossman. She teleports herself and Eli out of the facility, getting to the [[Citadel]], forcing Alyx and Gordon to take the risk in using the same teleporter to get back to Kleiner's lab. |
Gordon meets up with Alyx Vance in the Nova Prospekt train depot. They discover that Dr. Mossman was actually a Combine spy working on Breen's side. Together, they search the [[Nova Prospekt|prison]] for Eli Vance and Judith Mossman, all the while fighting off [[Nova Prospekt Prison Guard|security forces]]. They split up several times, but finally they reunite to track down Mossman. She teleports herself and Eli out of the facility, getting to the [[Citadel]], forcing Alyx and Gordon to take the risk in using the same teleporter to get back to Kleiner's lab. |
||
| − | |||
| − | ====Trivia==== |
||
| − | *From this chapter onward throughout the rest of the game, no Antlions will appear. Although this renders the primary function of the [[Bugbait]] useless, it can still be used for briefly stunning [[Combine Soldier|Combine troops]]. |
||
{{-}} |
{{-}} |
||
| Line 137: | Line 112: | ||
[[File:Kleiner shotgun.jpg|200px|thumb|Kleiner greeting Alyx and Gordon with a shotgun and Lamarr, mirroring a scene from ''Half-Life''.]] |
[[File:Kleiner shotgun.jpg|200px|thumb|Kleiner greeting Alyx and Gordon with a shotgun and Lamarr, mirroring a scene from ''Half-Life''.]] |
||
| − | [[File:City 17 Rebels tunnel.jpg|200px|thumb|Resistance members inside a damaged underground road tunnel of City 17.]] |
||
| − | Upon arriving in [[Kleiner's Lab]] after teleporting away from the [[Depot]], [[Gordon Freeman]] and [[Alyx Vance]] discover they have been stuck in a teleport "loop" for approximately one week. They find that the teleport caused the destruction of [[Nova Prospekt]], and the blow they struck there was taken as a sign to begin [[The Uprising]]. The two factions have been locked in combat for a week and all of [[City 17]] is a warzone. Freeman goes on to aid in the battle, while [[Alyx]] remains in [[Kleiner's Lab]] to help him escape the city. The player is able to form small squads of citizens to help fight their way through the city towards [[Barney Calhoun|Barney's]] location. Near the end of the chapter, Alyx |
+ | Upon arriving in [[Kleiner's Lab]] after teleporting away from the [[Depot]], [[Gordon Freeman]] and [[Alyx Vance]] discover they have been stuck in a teleport "loop" for approximately one week. They find that the teleport caused the destruction of [[Nova Prospekt]], and the blow they struck there was taken as a sign to begin [[The Uprising]]. The two factions have been locked in combat for a week and all of [[City 17]] is a warzone. Freeman goes on to aid in the battle, while [[Alyx]] remains in [[Kleiner's Lab]] to help him escape the city. The player is able to form small squads of citizens to help fight their way through the city towards [[Barney Calhoun|Barney's]] location. Near the end of the chapter, Alyx finds that the bridge to Barney's location is destroyed. She climbs up a building and tries to return to help [[Gordon]] but is captured by Combine soldiers and taken to the Citadel. |
{{-}} |
{{-}} |
||
| Line 148: | Line 122: | ||
Gordon teams up with [[Barney Calhoun|Barney]] and together they lead a battle at the [[Overwatch]] Nexus, finally fighting at the foot of the [[Citadel]]. This section involves heavy urban combat, aided by resistance members, against Striders, Gunships, and Elite Combine Soldiers. |
Gordon teams up with [[Barney Calhoun|Barney]] and together they lead a battle at the [[Overwatch]] Nexus, finally fighting at the foot of the [[Citadel]]. This section involves heavy urban combat, aided by resistance members, against Striders, Gunships, and Elite Combine Soldiers. |
||
| − | |||
| − | ==== Trivia ==== |
||
| − | * The picture belonging to this chapter shown in the chapter selection menu is actually part of ''Anticitizen One''. |
||
{{-}} |
{{-}} |
||
| Line 157: | Line 128: | ||
[[File:Citadel View.jpg|200px|thumb|View of City 17 from the Citadel.]] |
[[File:Citadel View.jpg|200px|thumb|View of City 17 from the Citadel.]] |
||
| − | [[File:Razor train.jpg|200px|thumb|A [[Razor Train]] passing by in the Citadel.]] |
||
Gordon infiltrates the [[Citadel|Combine Citadel]], upon entering a security gate he is disarmed of all his weapons with the exception of the Gravity Gun, which is mysteriously super-powered by the combine technology. It is now capable of lifting heavier items from a greater distance, including [[Combine]] [[Overwatch Soldier|Soldiers]] and [[Overwatch Elite|Elites]], vaporizing their weapons. Equipped with this, Gordon proceeds upwards fighting through the citadel, making his way to the office of Dr. Wallace Breen. |
Gordon infiltrates the [[Citadel|Combine Citadel]], upon entering a security gate he is disarmed of all his weapons with the exception of the Gravity Gun, which is mysteriously super-powered by the combine technology. It is now capable of lifting heavier items from a greater distance, including [[Combine]] [[Overwatch Soldier|Soldiers]] and [[Overwatch Elite|Elites]], vaporizing their weapons. Equipped with this, Gordon proceeds upwards fighting through the citadel, making his way to the office of Dr. Wallace Breen. |
||
| − | |||
| − | ====Trivia==== |
||
| − | *The view of City 17 as seen from the Citadel is actually a satellite image of nighttime Brooklyn, NY. |
||
| − | *The long ride sequence through the Citadel calls back to the opening sequence of the original ''Half-Life'': that of a long sequence through a large facility that is for the most part intact. This idea is completed with the first two chapters of ''Episode One'': a facility seen once fully intact now falling apart due to a large explosion, just like the Resonance Cascade. |
||
{{-}} |
{{-}} |
||
| Line 170: | Line 136: | ||
[[File:Half-Life 2 Dr Breen Office.jpg|200px|thumb|Gordon Freeman, Alyx (not seen) and Eli Vance being kept prisoner by Breen in his office.]] |
[[File:Half-Life 2 Dr Breen Office.jpg|200px|thumb|Gordon Freeman, Alyx (not seen) and Eli Vance being kept prisoner by Breen in his office.]] |
||
| − | [[File:Trio citadel kiss.jpg|200px|thumb|Alyx saying goodbye to her father after Breen's escape.]] |
||
| − | |||
| ⚫ | Gordon reaches the administrator's office for the climactic confrontation with [[Wallace Breen]] and the leaders of the [[Resistance]]. [[Mossman]] eventually regrets that she helped Breen, and |
||
| − | [[File:FloatingPod.jpg|thumb|200px|The pod that Freeman is in that can be seen floating in the air, Freeman is also invisible.]] |
||
| ⚫ | Gordon reaches the administrator's office for the climactic confrontation with [[Wallace Breen]] and the leaders of the [[Resistance]]. [[Mossman]] eventually regrets that she helped Breen, and betrays him by releasing [[Freeman]], [[Alyx]], and [[Eli]] from the pods. [[Breen]] attempts to kill them by using the supercharged Gravity Gun and escapes with it. Alyx and Gordon finds him arguing with an Advisor and escapes before they are able to get to him, leaving the Gravity Gun on the floor. They open the windows and find the Dark Energy Reactor at the very top of the Citadel. Alyx lets Gordon down to the Reactor where Breen starts ascending and opens the [[Combine Overworld]] portal. Gordon destroys the reactor, causing it to fail and begin to go critical. The reactor explodes, apparently killing [[Breen]] and nearly taking Alyx and Gordon with it. As the reactor detonates, however, [[the G-Man]] freezes time and addresses Gordon. He is put back into stasis by [[the G-Man]]. The fate of Breen and Alyx is unknown at the ending of this game, but [[Alyx]]'s fate is revealed in the [[Half-Life 2: Episode One|sequel]]. In the sequel, Alyx states that she "saw Breen fall", implying his death. However, Breen's fate still remains unrevealed. |
||
| − | === Trivia === |
||
| − | If the player uses cheats and enters third person mode via console, whilst in the pod, after Mossman appears and while it is moving, it can actually be seen floating in the air. After it stops, it "attaches" to the rail like the rest of them.{{-}} |
||
== Narrative == |
== Narrative == |
||
Revision as of 18:39, 2 May 2020
| You can help by correcting spelling and grammar, removing factual errors, rewriting sections to ensure they are clear and concise, and moving some elements when appropriate. Visit our Cleanup Project for more details and, please, notify the administrators before removing this template. |
| Gameplay tactics, trivia and walkthrough information should not be included, unless they are related to the plot; instead add it to its respective chapter article. |
This article describes the Half-Life 2 storyline, chapter by chapter.
The original Half-Life takes place at the Black Mesa Research Facility in 200-. During an experiment, researchers at Black Mesa accidentally cause a Resonance Cascade which rips open a portal to Xen, the only known borderworld. Creatures from Xen flood into Black Mesa via the portal and start killing everyone in sight. The player takes on the role of Dr. Gordon Freeman, one of the research scientists who has been involved in the accident, and who now must escape the facility.
At the end of the game, a mysterious figure referred to as the G-Man extracts Gordon from Xen, where he defeated the Nihilanth, and "offers" a job to Gordon. Forced to agree, Gordon is subsequently put into stasis for approximately 20 years.
Chapter 1: Point Insertion

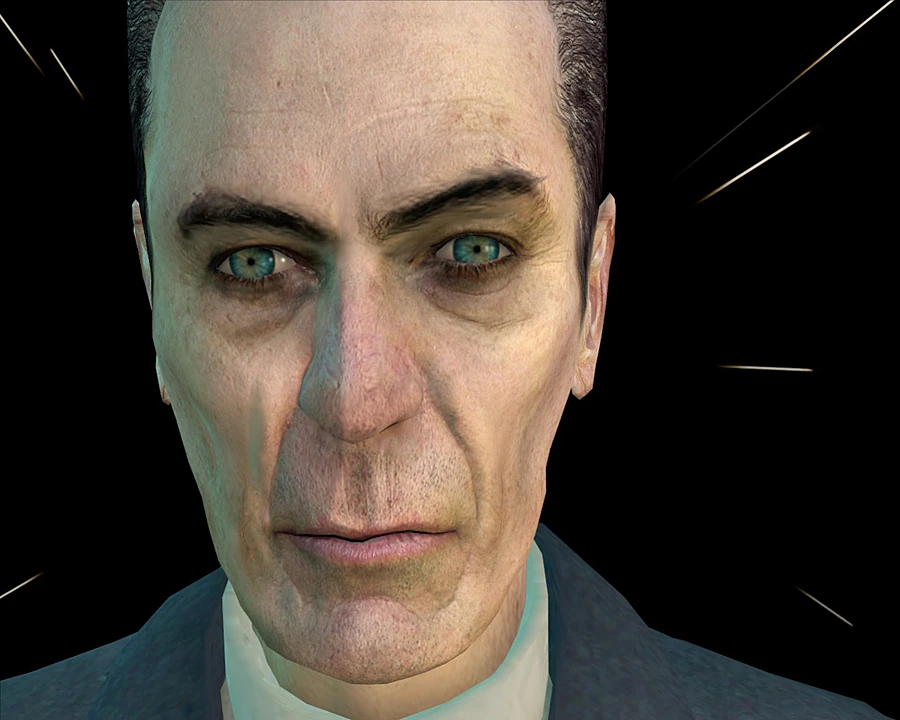
The G-Man addresses Gordon Freeman.


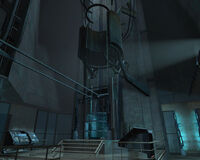
The Trainstation Plaza.
Nearly twenty years after the Black Mesa Incident[1], the G-Man wakes Gordon Freeman from stasis and inserts him (seemingly without any goals) into a train arriving in City 17, a city located somewhere in Eastern Europe under the control of the Combine Empire.
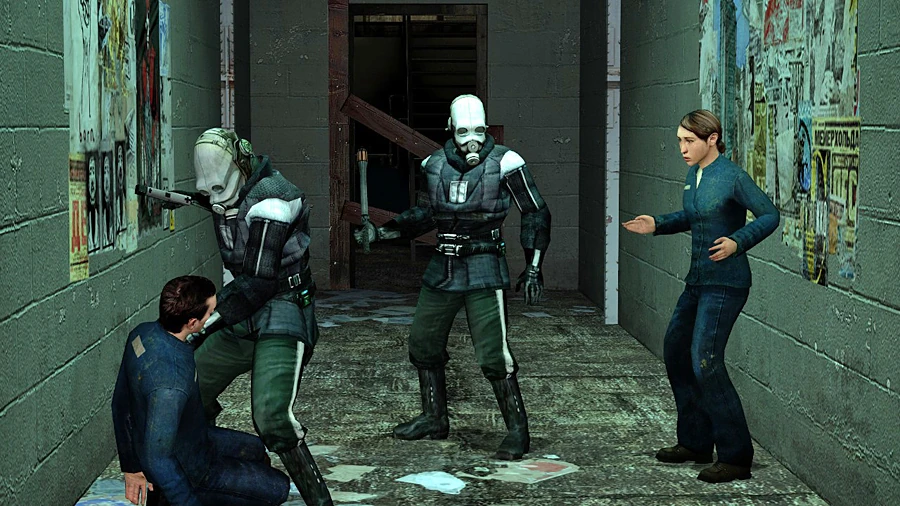
After leaving the train, Gordon and the other passengers are welcomed by a broadcast by Dr. Wallace Breen, former administrator of Black Mesa, and now the administrator of Earth. Continuing on his way, Gordon meets armed Civil Protection officers policing the train station and its surroundings. One of them separates him from the rest of the arriving citizens and directs him into a small interrogation room before revealing himself to be former Black Mesa security guard Barney Calhoun, who is operating undercover for the Resistance.
Barney contacts Dr. Isaac Kleiner, Gordon's mentor from his MIT days and former Black Mesa employee. After a bit of discussion, they decide to send Gordon over to Kleiner's Lab. Along the way, Gordon finds himself in the middle of a Civil Protection raid on a tenement house; after being captured, Gordon is rescued by a young woman named Alyx Vance.
Chapter 2: "A Red Letter Day"


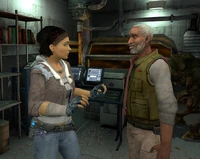
Alyx and Dr. Kleiner discuss Gordon's arrival.


Gordon outside the lab during the teleporter malfunction.
Alyx, the daughter of Eli Vance, a former Black Mesa employee now leading the Resistance against the Combine, takes Gordon to Dr. Kleiner's lab. There he is given an H.E.V. Suit and instructed to be teleported to Black Mesa East with Alyx, where he will be able to work alongside other scientists.
After teleporting Alyx, Gordon is next, but an interruption from Kleiner's pet Headcrab, Lamarr, causes a malfunction in the teleporter, sending Gordon to Dr. Breen's office, who recognizes him as a threat and puts Combine forces on full alert.
Following the failed teleport sequence, Gordon's only option is to go on foot through the old Canals, with Civil Protection officers in hot pursuit. Before starting his journey, Gordon is given a Crowbar by Barney.
Trivia
- A red letter day is any day of special significance. In this case, the day the chapter takes place on is the day where the teleporter, which is intended to be used as a much safer way to help citizens escape the city to Black Mesa East, is finished.
Chapter 3: Route Kanal
First encounter with some Civil Protection officers.

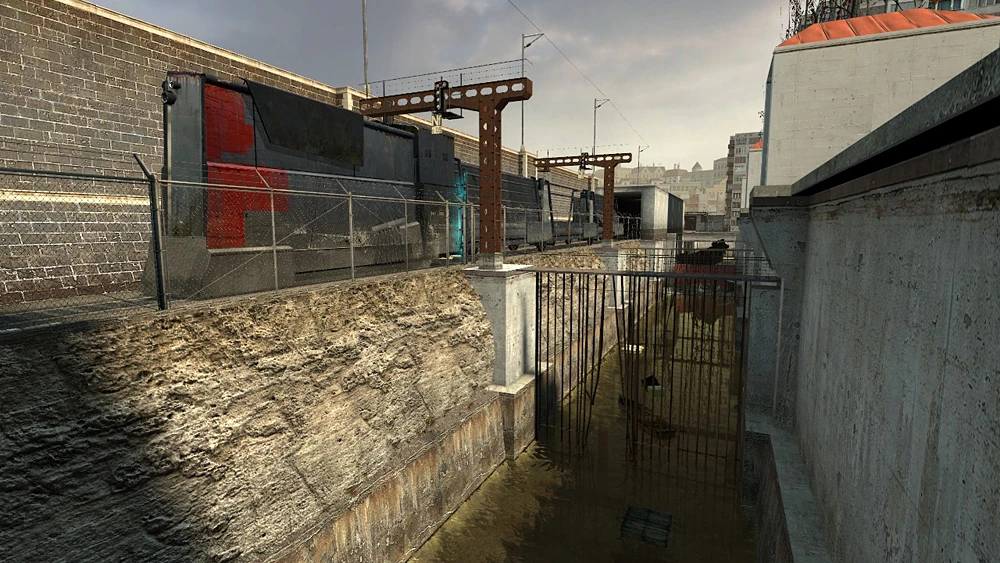
A Razor Train passes by the canal.
With the Crowbar, Gordon is able to disarm two Civil Protection officers who had cornered a couple of Citizens, obtaining in this way his first firearm, the USP Match. Being armed allows Gordon to defeat all Civil Protection Units dispatched to the area before reaching Station 12, one of the many stations set up by the Underground Railroad, a network helping refugees escape City 17.
Most of these Stations and outposts are already under attack by the time Gordon arrives; generally filled with Manhacks or being bombarded with Headcrab Shells. Along the way, Gordon obtains his second firearm, the MP7.
Eventually, Gordon reaches Station 6 (now under attack by Headcrabs); where he receives the Airboat, a makeshift vessel with an aircraft-type propeller, to help him traverse the toxic system of canals and get to Black Mesa East quick and safely.
Chapter 4: Water Hazard

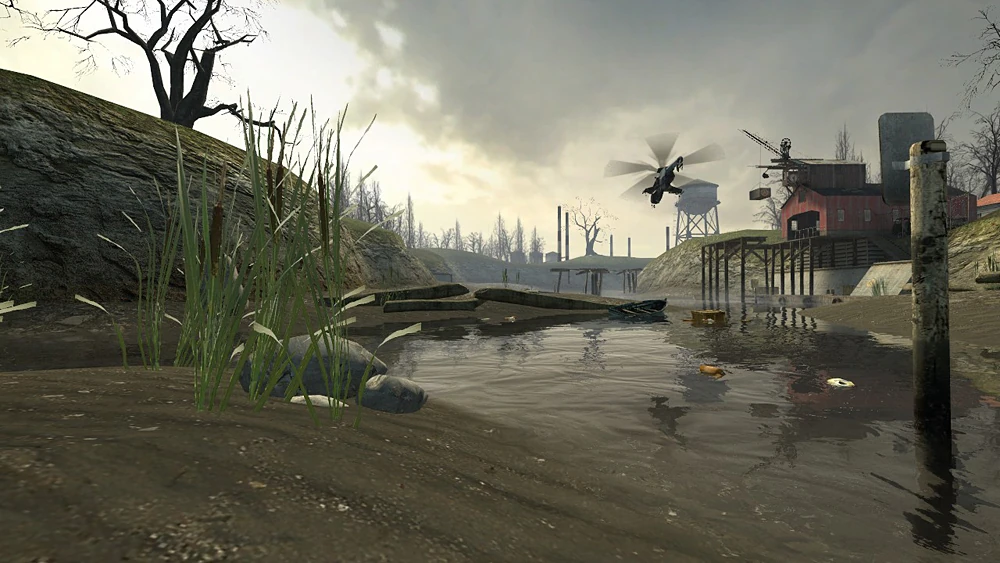
Hunter-Chopper passing by Station 7.
Aboard the airboat, Gordon fights off numerous Civil Protection units and a Hunter-Chopper. Along the way, the boat is upgraded with a pulse gun by a Vortigaunt.
Chapter 5: Black Mesa East

Eli and Alyx Vance chatting at Black Mesa East.

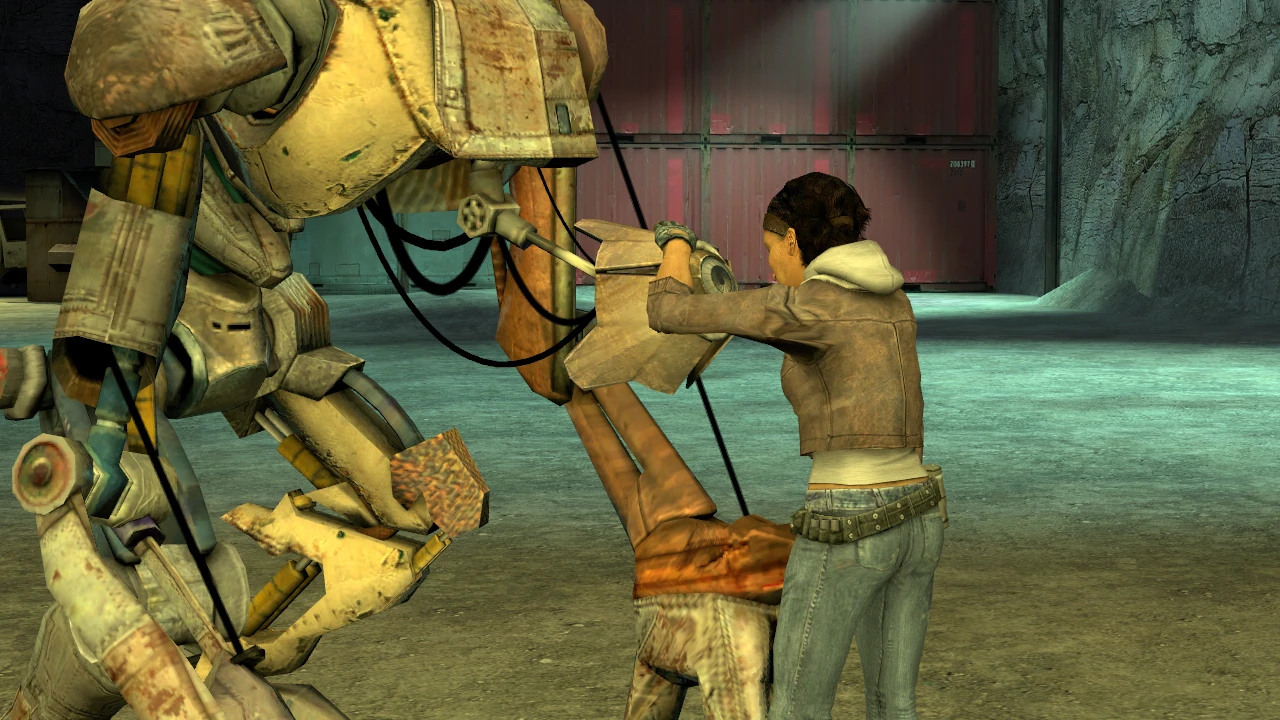
Alyx and Dog in the Black Mesa East scrapyard.
Gordon Freeman finally reaches his destination, Black Mesa East, after a series of chases through the canals and waterways around City 17. Gordon meets Dr. Judith Mossman for the first time, and is reunited with Resistance Leader and former Black Mesa Scientist Eli Vance and Alyx. Gordon is also introduced to the Zero Point Energy Field Manipulator, also known as the 'Gravity Gun', a physics manipulator that quickly becomes indispensable, and after that, Gordon meets Dog, Alyx's robotic "pet." Like A Red Letter Day, this chapter is full of insight and dialogue about the current state of the world, the people in it, and the aftermath of the Black Mesa Incident. While Gordon is playing with Dog in the scrapyard, Alyx spots Combine Scanners sweeping the area, shortly before an all out aerial raid on Black Mesa East. While attempting to rejoin the others, Gordon and Dog are separated from Alyx by a collapsed ceiling, and Gordon is forced to escape down a tunnel to Ravenholm, a place that Alyx didn't want to talk about earlier, showing obvious discomfort at the thought.
Chapter 6: "We Don't Go To Ravenholm..."
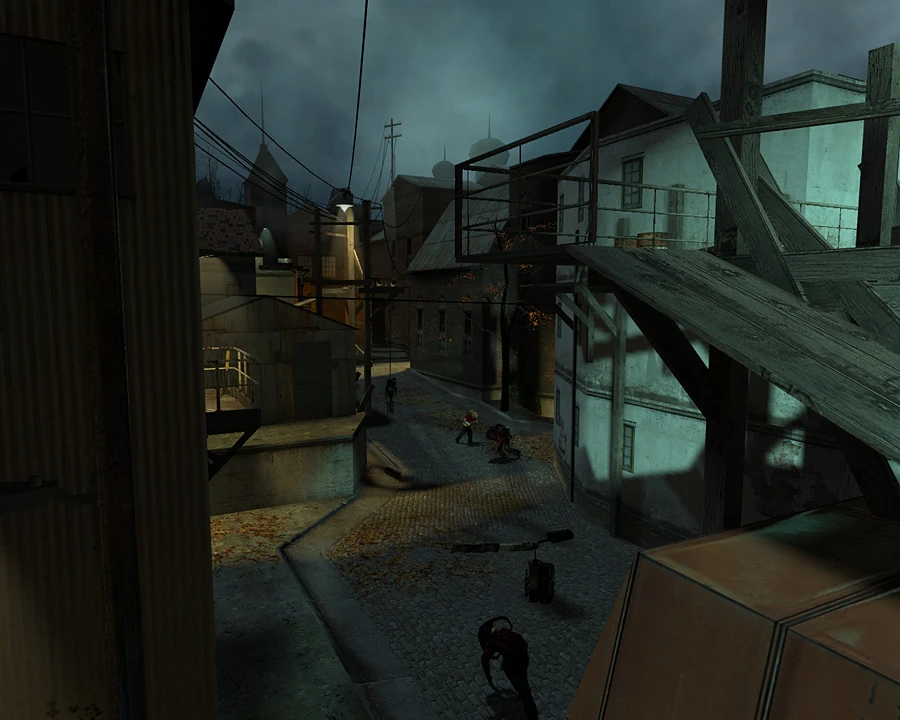
Zombies in Ravenholm.
Gordon journeys through the tunnel to the ghost town of Ravenholm. Originally a hidden village that lived free from the rule of the Combine, it was discovered by the Combine and attacked by hundreds of Headcrab Shells, thus transforming almost the entire population into deadly Zombies. This chapter also introduces two new headcrab variants - the Poison Headcrab and the Fast Headcrab - and their Zombie counterparts. Freeman kills Zombies and avoids bizarre deathtraps, meeting the man who set them, Father Grigori, who gives Gordon a shotgun. Freeman and Grigori make their way to an old mine which has a path that leads back to City 17, but Grigori stays behind to fight Zombies, and he continues to do so until the crypt behind him bursts open, leaving more zombies to come out from it. He continues to shoot the Zombies for a while until he runs through a blazing fire into the crypt. Gordon navigates the mines ahead, then walks down a railroad avoiding Combine snipers to reach Shorepoint Base.
Chapter 7: Highway 17

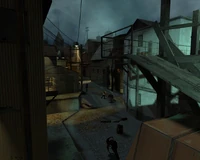
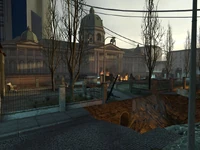
Broken bridge and car wrecks on Highway 17 near Dock 137.
Freeman is informed that Eli Vance has been taken to Nova Prospekt and sets out on a journey along Highway 17 to rescue him. The player encounters Combine Soldiers for the first time as well as a new type of Xen alien, the Antlions. Colonel Odessa Cubbage is also met in this level, giving Gordon the RPG. Gordon deactivates Force Fields in order to progress across a bridge.
Chapter 8: Sandtraps

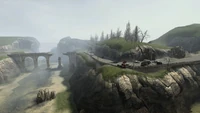
Combine Bunkers soon to be assaulted by Antlions.
Continuing on to Nova Prospekt, Gordon exits a Zombie-infested tunnel, fends off a Combine raid on Lighthouse Point, and passes through the last part of the coast without the Scout Car. He encounters the first Antlion Guard of the game and is then trained in usage of the Antlion Guard's pheropods by a Vortigaunt working with the Resistance. He then continues to the final part of the coast, where he battles many Nova Prospekt guards on his way into the prison. In this chapter, Antlions become the player's allies, since Gordon has the Bugbait pheropod.
Chapter 9: Nova Prospekt

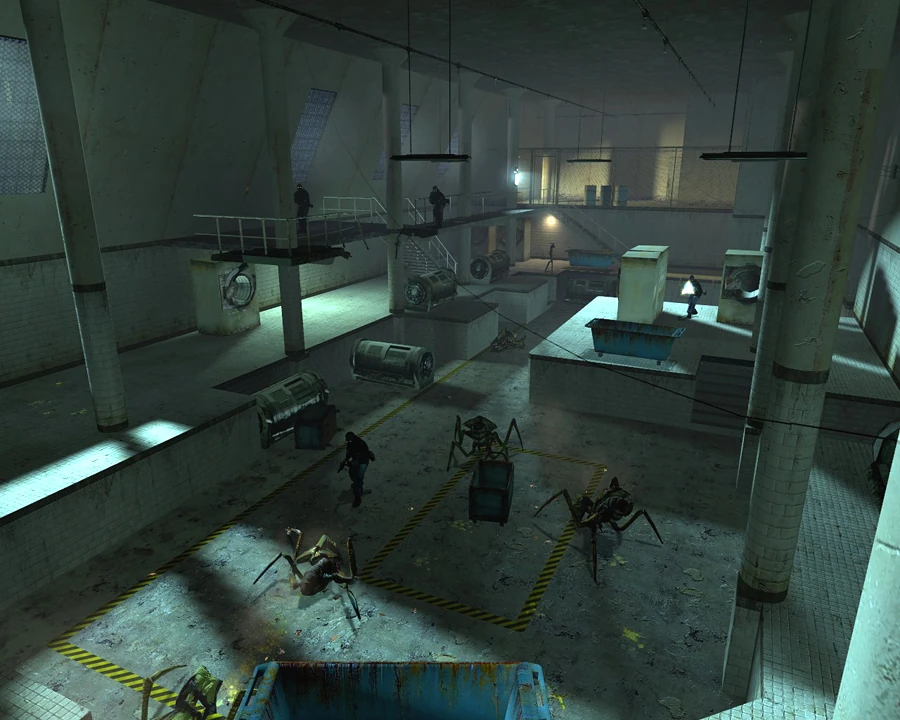
Nova Prospekt Prison Guards fighting Antlions in the laundry room of block C1 in Nova Prospekt.
Gordon gains access to Nova Prospekt, a Combine base, and a former prison, breaching its defenses with the help of an army of Antlions, with the goal of finding and rescuing the captured Resistance leader, Eli Vance. This is also the last chapter where Antlions are encountered, because the player soon leaves Antlion Territory. The player is introduced to Combine Turrets here as well.
Chapter 9a: Entanglement

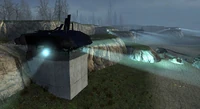
The Combine teleport in the lower levels of the Depot.
Gordon meets up with Alyx Vance in the Nova Prospekt train depot. They discover that Dr. Mossman was actually a Combine spy working on Breen's side. Together, they search the prison for Eli Vance and Judith Mossman, all the while fighting off security forces. They split up several times, but finally they reunite to track down Mossman. She teleports herself and Eli out of the facility, getting to the Citadel, forcing Alyx and Gordon to take the risk in using the same teleporter to get back to Kleiner's lab.
Chapter 10: Anticitizen One
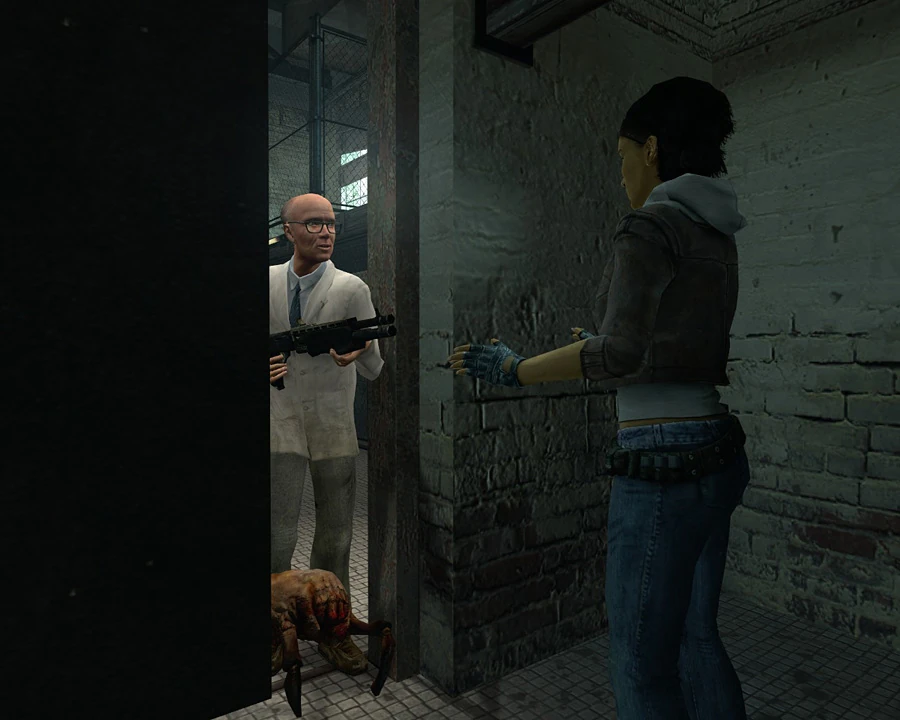
Kleiner greeting Alyx and Gordon with a shotgun and Lamarr, mirroring a scene from Half-Life.
Upon arriving in Kleiner's Lab after teleporting away from the Depot, Gordon Freeman and Alyx Vance discover they have been stuck in a teleport "loop" for approximately one week. They find that the teleport caused the destruction of Nova Prospekt, and the blow they struck there was taken as a sign to begin The Uprising. The two factions have been locked in combat for a week and all of City 17 is a warzone. Freeman goes on to aid in the battle, while Alyx remains in Kleiner's Lab to help him escape the city. The player is able to form small squads of citizens to help fight their way through the city towards Barney's location. Near the end of the chapter, Alyx finds that the bridge to Barney's location is destroyed. She climbs up a building and tries to return to help Gordon but is captured by Combine soldiers and taken to the Citadel.
Chapter 11: "Follow Freeman!"

The Overwatch Nexus after the battle.
Gordon teams up with Barney and together they lead a battle at the Overwatch Nexus, finally fighting at the foot of the Citadel. This section involves heavy urban combat, aided by resistance members, against Striders, Gunships, and Elite Combine Soldiers.
Chapter 12: Our Benefactors

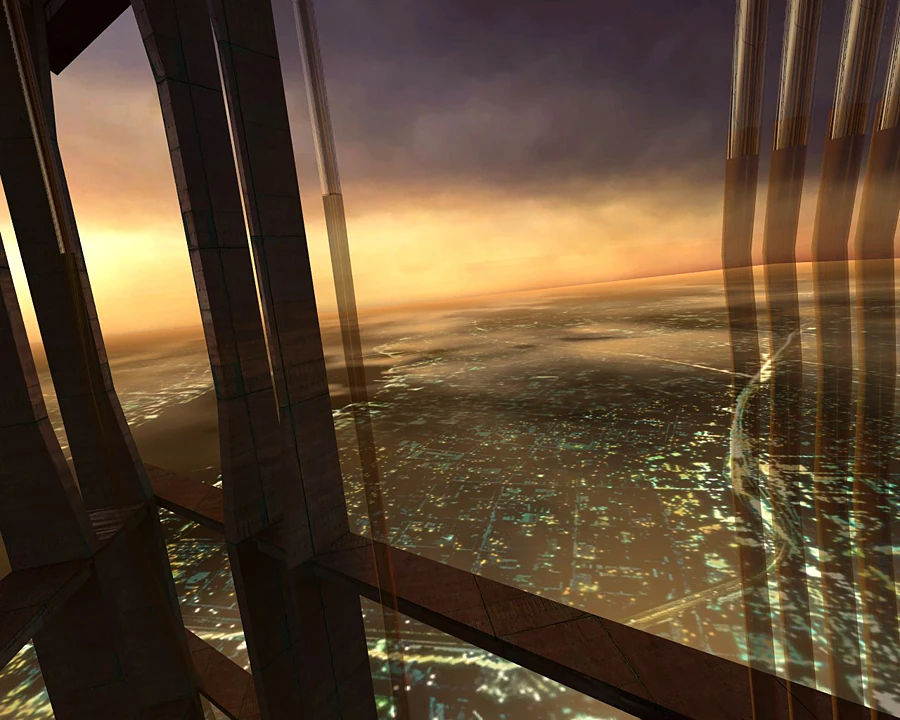
View of City 17 from the Citadel.
Gordon infiltrates the Combine Citadel, upon entering a security gate he is disarmed of all his weapons with the exception of the Gravity Gun, which is mysteriously super-powered by the combine technology. It is now capable of lifting heavier items from a greater distance, including Combine Soldiers and Elites, vaporizing their weapons. Equipped with this, Gordon proceeds upwards fighting through the citadel, making his way to the office of Dr. Wallace Breen.
Chapter 13: Dark Energy
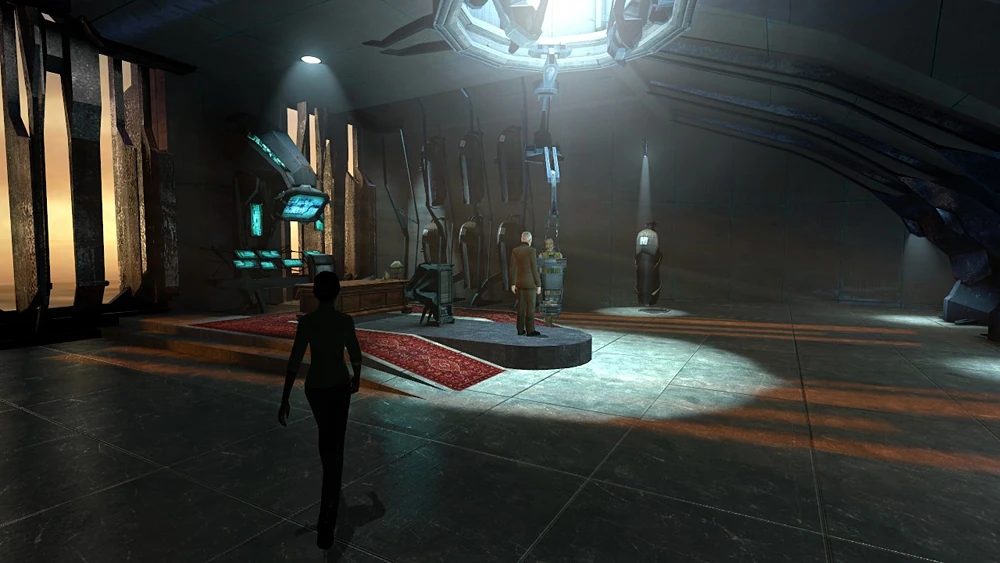
Gordon Freeman, Alyx (not seen) and Eli Vance being kept prisoner by Breen in his office.
Gordon reaches the administrator's office for the climactic confrontation with Wallace Breen and the leaders of the Resistance. Mossman eventually regrets that she helped Breen, and betrays him by releasing Freeman, Alyx, and Eli from the pods. Breen attempts to kill them by using the supercharged Gravity Gun and escapes with it. Alyx and Gordon finds him arguing with an Advisor and escapes before they are able to get to him, leaving the Gravity Gun on the floor. They open the windows and find the Dark Energy Reactor at the very top of the Citadel. Alyx lets Gordon down to the Reactor where Breen starts ascending and opens the Combine Overworld portal. Gordon destroys the reactor, causing it to fail and begin to go critical. The reactor explodes, apparently killing Breen and nearly taking Alyx and Gordon with it. As the reactor detonates, however, the G-Man freezes time and addresses Gordon. He is put back into stasis by the G-Man. The fate of Breen and Alyx is unknown at the ending of this game, but Alyx's fate is revealed in the sequel. In the sequel, Alyx states that she "saw Breen fall", implying his death. However, Breen's fate still remains unrevealed.
Narrative
Like in its predecessors, Gordon never speaks and the player views the action through his eyes only throughout the entirety of Half-Life 2. There are no cut-scenes, nor any discontinuities or jumps in time from the player's point of view. Some have criticized these design decisions as narrative holdovers from Half-Life,[2] that effectively limit how much of the backstory is explained. Due to the lack of cut-scenes, the player never directly sees what happens in Gordon's absence.
Ultimately, it is not clear to what extent Gordon exists as a separate character outside of the player's influence. Since the start of Half-Life, Valve has made sure that the player's and Gordon's experience are one and the same. An example of Valve's player strategy is shown during the scene in Eli's lab. Investigation of certain props (most notably the newspaper board) triggers Eli to give some explanation to their meaning and history, thus indicating that Gordon presents emotions (or dialogue) that the non-player characters can detect but the player cannot.[3]
The ending of Half-Life 2 is also very similar to that of the original: after completing a difficult task against seemingly impossible odds, Gordon is extracted from reality by the G-Man. Gordon is congratulated and told that "further assignments" should follow. The fates of many of the major characters, such as Alyx, Eli, and Judith, are left unexplored. Very few of the questions raised by Half-Life are answered, and several new ones are presented. The identity and nature of the G-Man remains a mystery. A number of these issues are addressed, however, in the sequel games, Episode One and Episode Two.
External links
- Half-Life 2 walkthrough on Mahalo
- Half-Life 2 walkthrough on Visual Walkthroughs
References
- ↑
 Episode One: The story so far on Half-Life 2's official website (Archived)
- ↑ Half-Life 2 for PC Review. GameSpot. Retrieved on October 10, 2005.
- ↑ Chapter V: Black Mesa East. Half-Life Fallout. Retrieved on May 21, 2006.
| General | Timeline of the Half-Life universe |
|---|---|
| Half-Life story arc | Half-Life (Opposing Force • Blue Shift • Decay) |
| Half-Life 2 story arc | Original storyline • Half-Life 2 (Episode One • Episode Two) |
| Portal story arc | Portal • Portal 2 |
| Alyx Vance's story arc | Half-Life: Alyx |